
![]() +86 18126095160
+86 18126095160
![]() bella@noparde.com
bella@noparde.com


2026-05-08 42
If you’re looking to project on the wall—whether it’s for a business logo, custom letters, or decorative designs—you’ve probably searched for answers to common questions like how to project letters on wall, what works best for logo projection on wall, or how to make a clear project on the wall. As a beginner or even a seasoned user, it’s normal to have doubts about ease of use, equipment choices, and troubleshooting. This guide breaks down the most frequently asked questions (FAQs) about wall projection, with practical tips to help you project logo on wall or letters smoothly, no professional experience required.
You don’t need expensive professional equipment to project letters on wall—even beginners can do it with simple, affordable tools. The easiest method is to use a portable LED projection lamp designed for custom text and logo projection. These lamps are user-friendly, lightweight, and require no complex setup. Start by finalizing your custom letter design: work with a professional to create tailored letters that fit your needs, and the design will be pre-loaded into the projection lamp for seamless use. Position the lamp 3–10 feet away from the wall—adjust the distance to get your desired letter size—and turn it on. For a budget-friendly alternative, you can use a smartphone with a portable screen mirroring device and a white wall, though a dedicated projection lamp with pre-loaded custom designs will deliver sharper results for long-term use. This method works perfectly for both temporary displays and permanent setups, making it easy to project letters on wall without any professional skills.
The best projector for logo projection on wall depends on your use case (indoor vs. outdoor) and budget, but there are key features to prioritize for clear, reliable results. Look for an LED projection lamp with high brightness (measured in lumens)—2000 lumens or more is ideal for indoor use, while outdoor setups need 5000 lumens or higher to combat natural light. A high-resolution lens (1080p or higher) ensures your logo edges are sharp, which is crucial for brand visibility. Portability is another plus, especially if you need to move the projector between locations. Many modern models also offer easy custom pattern replacement and adjustable focus, making it simple to project logo on wall and switch between your tailored designs as needed. Avoid overly cheap projectors with low lumens, as they will produce blurry, dim images that ruin your logo projection on wall. For most users, a mid-range LED projection lamp balances performance and affordability, delivering consistent, high-quality project on the wall.
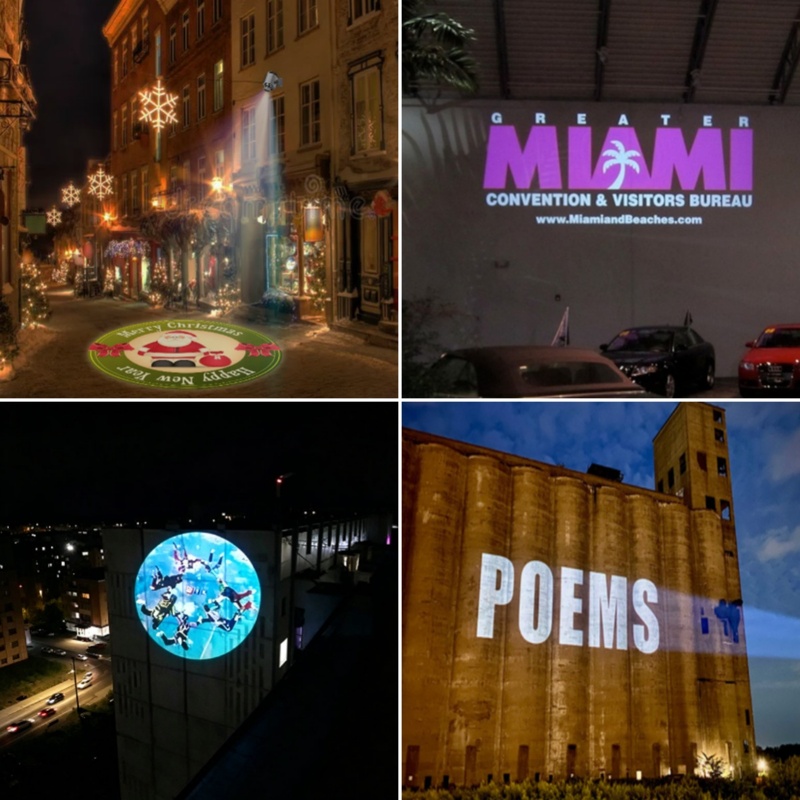
Achieving a clear project on the wall at night is easier than you might think, but a few small adjustments can make a big difference. First, choose a dark, low-light environment—even subtle ambient light (like streetlights or indoor lamps) can wash out your projection. If you’re projecting outdoors, position the lamp away from direct light sources and use a dark backdrop if the wall is light-colored. Adjust the projector’s focus dial until the text or logo is sharp—most lamps have a simple manual focus that takes seconds to set. For extra clarity, use a white or light-colored wall (dark walls absorb light and reduce visibility) that is smooth and free of texture or obstacles. If you’re using a logo projection on wall, ensure your custom logo design is high-resolution (avoid blurry or pixelated images) to prevent distortion. Additionally, check the projector’s brightness settings—lowering brightness slightly in dark environments can reduce glare and improve sharpness, resulting in a crisp, clear project on the wall all night long.
Yes, it’s absolutely easy to project logo on wall for beginners—modern projection lamps with custom pre-loaded designs are designed with user-friendliness in mind. The entire process takes just a few steps: unbox the lamp, confirm your custom logo design is pre-loaded, position the lamp facing the wall, adjust the distance and focus, and turn it on. Most lamps come with simple instructions, and you won’t need any technical skills or tools. Even if you’ve never used a projector before, you can have a clear logo projection on wall in 5–10 minutes. To make it even easier, choose a lamp with pre-programmed custom letter templates if you also want to project letters on wall. The key is to start with a small, simple custom logo to practice, then move to more complex designs as you get comfortable. With a little practice, you’ll be able to project logo on wall or any custom design smoothly, making it a great option for small businesses, events, or home decor.
Blurriness is a common issue with wall projection, but it’s usually easy to fix. The most common cause is incorrect focus—simply turn the focus dial on the projector until the logo or letters are sharp. If that doesn’t work, check the distance between the lamp and the wall: most projectors have an optimal distance range (3–10 feet for small to medium projections), and moving the lamp closer or farther can improve clarity. Another culprit is a low-resolution custom logo file—if your logo is pixelated or stretched, it will appear blurry when projected. Work with your design provider to ensure you have a high-resolution vector file for your logo to ensure crisp edges. Additionally, check the wall surface: textured or uneven walls can distort the projection, so use a smooth, flat surface (or a portable projection screen) for the best results. If you’re projecting outdoors at night, ensure the lamp is bright enough to overcome ambient light—upgrading to a higher-lumen lamp can resolve dim, blurry projections and create a clear project on the wall.
To keep your wall projection setup running smoothly, follow these practical tips:
When setting up your projector for logo projection on wall or letter projection, choose a stable surface (like a table or mount) to avoid movement. For permanent setups, use a wall mount to keep the lamp secure and aligned. Ensure the lamp is facing the wall straight on—angled projections can distort letters or logos. If you’re using a portable lamp, position it at eye level for the best visibility. For outdoor use, look for a waterproof projector (IP65 or higher) to protect it from rain and dust.
Clean the projector lens regularly with a soft, dry cloth to remove dust—dirty lenses cause blurriness and reduce brightness. Turn off the lamp when not in use to extend its lifespan (most LED lamps last 20,000+ hours). Store the lamp in a cool, dry place to prevent overheating or damage. If you use the lamp outdoors, wipe it down after use to remove dirt or moisture.
- Can’t project letters on wall: Check if your custom letter design is properly pre-loaded into the projector. Ensure the lamp is turned on and the focus is adjusted. If using a smartphone screen mirroring device, verify that both devices are connected to the same WiFi.
- Project on the wall is too dim: Increase the lamp’s brightness setting or move it closer to the wall. Reduce ambient light in the area for better visibility.
- Logo is distorted: Adjust the projector’s angle to face the wall straight on. Ensure your custom logo design is not stretched or resized incorrectly.
With these tips and answers, you can confidently project on the wall—whether it’s logo projection on wall, projecting letters, or any other custom design. Remember, the key to success is choosing the right projector, using high-quality custom files, and making small adjustments to focus and environment. Even as a beginner, you’ll be able to create crisp, professional-looking projections in no time.